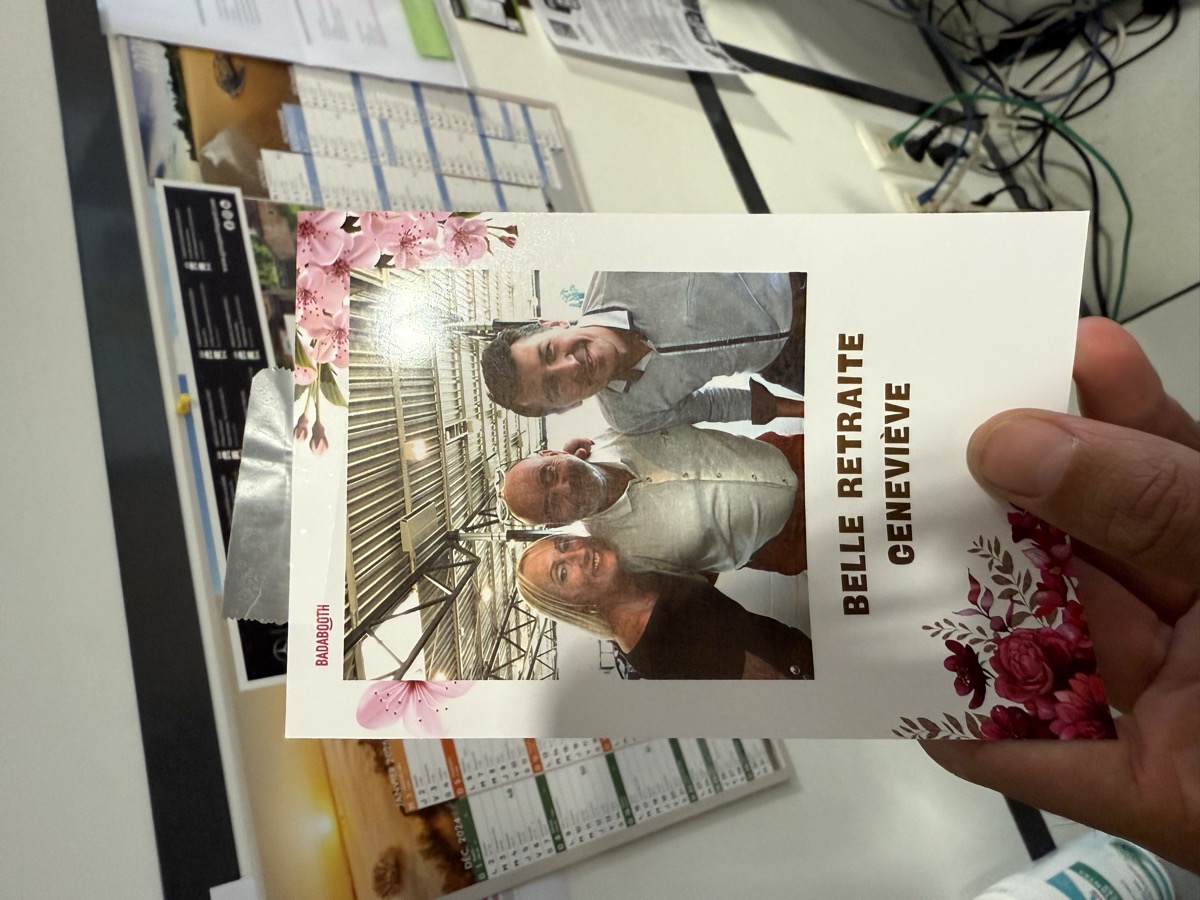
Wedding photo booth: the complete 2026 guide to an unforgettable experience
You’ve booked your photo booth for the most beautiful day of your life. Great. But between a photo booth ticking away in the background that nobody goes near, and a photo booth that becomes the highlight of the evening with a permanent queue… there’s a world of difference. And that difference comes down to the best practices we’re going to detail in this guide.
Having supported more than 500 weddings at Badabooth, we’ve identified what makes the difference between a “nice” photo booth and an unforgettable one. Custom frame, photo strip format for the guest book, strategic placement, a magnetic frame as a keepsake… Here’s everything you need to know.
“We thought the photo booth would be a little extra. In the end, it’s THE thing everyone is still talking to us about 6 months later!” Camille & Thomas, wedding, September 2025
Contents
- Why the photo booth has become a must-have in 2026
- Choosing the right photo format for your wedding
- The magnetic frame: the keepsake your guests will actually keep
- Photo strip + guest book: the winning combination
- Customising your photo frame in your wedding colours
- Where to place the photo booth: the 5 golden rules
- Perfect timing: when to launch the photo booth
- The props that make the difference
- Encouraging guests to join in: our tried-and-tested tips
- Mistakes to avoid at all costs
- Final checklist before the big day
- FAQ
1. Why the photo booth has become a must-have in 2026
The photo booth is no longer a gimmick. It has become a central part of the wedding experience, just like the DJ or the caterer. And the figures prove it:
- 94% of guests visit the photo booth at least once when it is well placed
- 78% of couples say the photo booth is the entertainment people talk to them about most after the wedding
- Printed photos are kept for an average of 4 years (compared with a few days for a Snap or an Instagram story)
What has changed in 2026 is that couples no longer just want “something fun in a corner”. They want an experience built into their decor and their theme, one that leaves a physical keepsake for every guest.
That’s exactly what new options like the custom frame, photo strip formats and magnetic frames make possible.
2. Choosing the right photo format for your wedding
Choosing the photo format is the first decision to make, and it shapes the whole experience. Here are the 4 available formats and their ideal uses:
| Format | Dimensions | Number of photos | Ideal for |
|---|---|---|---|
| Classic | 10 × 15 cm | 1 large photo | Group photo, magnetic frame |
| Polaroid | 10 × 10 cm | 1 square photo | Vintage style, minimalist decor |
| 3-photo strip | 5 × 15 cm | 3 poses | Guest book, comic series |
| 2-photo strip | 5 × 10 cm | 2 poses | Compact format, slips into a pouch |
Our recommendation for a wedding
The 3-photo strip format is the firm favourite for weddings. Why?
- Double print: each session prints 2 copies, one for the guest and one for the guest book
- 3 poses = more spontaneity (the first is often the most natural, the last the craziest)
- Slim format that slips perfectly into a guest book without weighing it down
- Customisation area at the bottom of the strip for your names, the date and a short message
If you’d rather have more of a “keepsake photo” to stick on the fridge, go for the classic 10×15 with a magnetic frame: more on that just below.
3. The magnetic frame: the keepsake your guests will actually keep
This is probably the most underrated tip, and yet the most effective one for making sure your photo booth leaves a lasting mark.
The idea
A magnetic photo frame sized to your photo format, customised in your wedding colours. Your guests slip their photo inside and leave with a keepsake ready to stick on the fridge.
Why it changes everything
A printed photo on its own, however beautiful, often ends up in a drawer or a handbag. A magnetic frame, on the other hand:
- Goes straight onto the fridge or any metal surface
- Stays visible for months, even years
- Reminds guests of your wedding every time they open their fridge
- Protects the photo (no creases, no stains)
How to include it
- Order your magnetic frames in the right size (10×15 for the classic, 5×15 for the strip)
- Customise them with your names, the date, and perhaps a pattern that matches your stationery
- Display them next to the photo booth in a pretty basket or a wooden box
- Add a small sign: “Slip your photo into the frame and take your keepsake home!”
“The magnetic frames are THE thing we’d do again in a heartbeat. 6 months later, my friends still have our photo on their fridge.” Julie, married in June 2025
Indicative budget
| Quantity | Estimated unit price | Total |
|---|---|---|
| 50 frames | €2 to €3 | €100 to €150 |
| 80 frames | €2 to €3 | €160 to €240 |
| 120 frames | €1.50 to €2.50 | €180 to €300 |
Tip: order 10 to 20% more than the number of guests. Some guests will come back several times, and you’ll keep a few for yourselves too.
4. Photo strip + guest book: the winning combination
If you only remember one tip from this guide, make it this one: 3-photo strip + guest book = the perfect combo.
How it works
- The guest uses the photo booth → 2 identical strips are printed
- The guest sticks one strip in the guest book and writes a short note next to it
- The guest keeps the other strip as a keepsake
The result: you end up with a guest book full of photos and messages, far livelier than a simple notebook of written messages.
Choosing the right guest book
| Type of book | Advantages | Drawbacks |
|---|---|---|
| Blank photo album (black or kraft pages) | Premium look, photos stand out well | More expensive, needs glue or tape |
| Lined / blank notebook | Simple, guests can write freely | Less attractive with photos stuck in |
| Special photo booth guest book | Slots designed for the strips | Less flexible if the format changes |
| Multi-photo wall frame | Original, decorative | No room for written messages |
Our favourite: a photo album with kraft pages and adhesive photo corners. The contrast between the dark page and the printed photos is superb, and guests can write in white or gold marker.
What you’ll need
- A quality album (at least 40 pages for 80+ guests)
- Double-sided tape or self-adhesive photo corners
- 2-3 pens with white or metallic ink (gold, silver)
- A small explanatory sign (“Stick in your photo and write us a note!”)
To find out more on the subject, read our dedicated article: Photo booth and guest book: the perfect combo for your wedding.
5. Customising your photo frame in your wedding colours
Customising the photo frame is what turns a standard print into a unique keepsake. With the Badabooth frame editor, you can create a design that matches your wedding in just a few minutes.
What you can customise
- Your names and the date: the essentials, in an elegant font
- The colour theme: pick up the shades of your stationery (invitations, menu, place cards)
- A logo or monogram: your intertwined initials, a floral pattern, an illustration
- A hashtag: to easily find the photos shared on social media
- A short message: “Thank you for sharing this day with us”, “Love is in the air”…
Design tips
Do:
- Keep it understated and elegant: a wedding isn’t a child’s birthday party
- Use 2 colours maximum + white/black
- Choose a font that’s legible even at small sizes (avoid very thin scripts)
- Leave space around the text (no clutter)
Avoid:
- Including too much information (no need for the venue, the times or the menu)
- Using neon or overly bright colours
- Using a busy background that drowns out the photo
Examples of popular styles in 2026
| Style | Palette | Font | Effect |
|---|---|---|---|
| Romantic | Powder pink + gold | Great Vibes / Dancing Script | Elegant, soft |
| Rustic | Sage green + terracotta | Amatic SC / Caveat | Natural, relaxed |
| Modern | Black + white | Montserrat / Raleway | Clean, chic |
| Vintage | Sepia + cream | Playfair Display / Lora | Retro, timeless |
| Boho | Terracotta + linen | Sacramento / Satisfy | Free-spirited, poetic |
6. Where to place the photo booth: the 5 golden rules
Where you place the photo booth directly determines how much it gets used. Badly placed, it will be ignored. Well placed, it will never be empty.
Rule no. 1: on the way through, not in a corner
The photo booth must be visible and accessible without any effort. Place it on a natural path:
- Near the bar or the dessert buffet
- Near the dance floor (but not on it)
- In the cocktail area if you have one
Classic mistake: putting it in a separate room or a corridor. If guests have to look for it, 50% of them won’t make the effort.
Rule no. 2: suitable lighting
The Badabooth photo booth has its own built-in flash, but the surroundings matter too:
- Avoid areas in full sun (backlight on the screen)
- Avoid areas that are too dark (gloomy atmosphere in the photos)
- The ideal: an area with soft ambient lighting (fairy lights, LED candles)
Rule no. 3: a neutral or themed backdrop
What’s behind your guests matters as much as the photo frame:
- A plain wall (stone, wood, fabric) is perfect
- A custom backdrop (sheer curtain, flower garland, wooden panel) makes the photos shine
- Avoid cluttered backgrounds (tables, chairs, visible bins)
Rule no. 4: space for groups
Allow a space of at least 2 × 3 metres in front of the photo booth. Groups of 6-8 people are common at weddings, and nobody wants to feel cramped.
Rule no. 5: the guest book right next to it
Set up a small table with the guest book, the glue and the pens right next to the photo booth. The natural flow should be: photo → sticking → message → back to the party.
7. Perfect timing: when to launch the photo booth
The moment the photo booth is switched on has a huge influence on its success. Here is the ideal timing, tested at hundreds of weddings:
| Moment | Use | Recommendation |
|---|---|---|
| Cocktail hour (before dinner) | ★★★★☆ | Very good: guests are relaxed and not yet tired |
| Between courses | ★★☆☆☆ | Average: guests are seated and reluctant to move |
| After dessert | ★★★★★ | Ideal: guests are cheerful, uninhibited, ready to pose |
| During the dancing | ★★★★★ | Best: outfits are loosened, poses are wild |
| End of the night (after midnight) | ★★★☆☆ | Fun, but photos are often blurry (movement) |
Our recommendation
Launch the photo booth after dessert and let it run all evening. That’s when it will be used the most. With the Badabooth Smile or Happy package, you have the photo booth for long enough to cover this key period.
Timing tip: ask the DJ or the master of ceremonies to announce the opening of the photo booth. “And now, the photo booth is open! Go and take your best photos!” This creates a little event within the event.
8. The props that make the difference
Props turn the photo booth into a playground for your guests. Here’s what works best at weddings:
The essentials
- Signs with messages: “Just Married”, “Team Groom / Team Bride”, “Best Day Ever”
- Hats and crowns: flower crowns, top hats, veils
- Novelty glasses: heart-shaped, oversized, glittery
- Giant frame: an empty gold frame for guests to pose in (in addition to the photo booth itself)
The little extras that stand out
- Custom signs with the couple’s private jokes
- A whiteboard where guests write a message before posing
- Fans or parasols (summer wedding)
- Coloured feather boas and bow ties
What to avoid
- Latex masks (scary in photos)
- Too many props at once (guests spend more time choosing than posing)
- Fragile props that break after 10 uses
Props budget: allow €30 to €80 for a complete kit that will last the whole evening. Plenty of kits are available online, or you can make them yourself (Pinterest DIY).
9. Encouraging guests to join in: our tried-and-tested tips
Even with the best photo booth in the world, some guests hesitate. Here’s how to (gently) nudge them to give it a go.
Tip no. 1: the couple leads by example
The couple goes first, ideally just after dessert. If guests see the newlyweds having fun at the photo booth, they’ll follow. It’s also a chance to take an official couple photo with the custom frame: a unique keepsake.
Tip no. 2: create a photo challenge
Prepare a list of photo challenges displayed next to the photo booth:
- A photo with the newlyweds
- The craziest face
- The biggest group of friends
- The most romantic pose
- The quirkiest photo
- Recreate an old married couple photo
Tip no. 3: a visible, welcoming sign
Never underestimate the power of a beautiful sign. A simple “PHOTO BOOTH →” in gold lettering on an easel works wonders.
Tip no. 4: get the witnesses involved
Brief your witnesses and bridesmaids so they bring along the shy ones. “Come on, let’s all go and take a photo at the photo booth!” is the magic phrase.
Tip no. 5: the double print as a trigger
When guests know that one copy is for the guest book, they feel they have a mission. It’s no longer “I’m going to take a photo for me” but “I’m going to leave a keepsake for the newlyweds”. And that makes all the difference in terms of participation.
10. Mistakes to avoid at all costs
In 10 years of experience, we’ve seen (almost) every possible mistake. Here are the most common ones so you don’t repeat them:
Mistake no. 1: waiting until the last minute to book
Weekends in May, June and September get snapped up. Book your photo booth 3 to 6 months in advance to be sure of getting your date. With Badabooth, you can book online in a few minutes.
Mistake no. 2: not testing the customisation beforehand
Don’t finalise your photo frame the day before the wedding. Take the time to create it, show it to your other half, and adjust it. The frame editor lets you preview the result in real time.
Mistake no. 3: forgetting extra paper
With 80 to 150 guests, a wedding uses an average of 200 to 400 prints. Our packages include enough paper, but check that you have enough to last the whole evening.
Mistake no. 4: placing the photo booth outside without protection
If your wedding is outdoors, plan an awning or a tent for the photo booth. Direct sunlight makes the screen unreadable, and evening damp can damage the printer.
Mistake no. 5: neglecting signage
No sign = no guests. Even if the photo booth is visible, a “Photo booth” sign with an arrow and a short inviting message increases use by 2 to 3 times.
Mistake no. 6: not planning for the guest book
If you go for the double print, having the guest book next to the photo booth is essential. Otherwise guests end up with two identical prints and don’t know what to do with the second one.
11. Final checklist before the big day
Use this checklist so you don’t forget anything:
3-6 months before
- Book the photo booth (see our packages)
- Choose the photo format (strip recommended for a guest book)
- Define the frame style (colours, font, message)
1-2 months before
- Create and finalise the custom frame using the editor
- Order the magnetic frames (if chosen)
- Buy the guest book + glue + pens
- Prepare the props (signs, hats, glasses)
- Make the “Photo booth” sign
1 week before
- Confirm the exact setup spot with the venue
- Check that a power socket is accessible nearby
- Prepare the photo challenges
- Brief the witnesses on their role as photo booth ambassadors
The big day
- Set up the photo booth after dessert (or according to your chosen timing)
- Place the guest book, pens and glue on a table next to it
- Put the magnetic frames in a basket
- Lay out the props
- Put up the sign
- The newlyweds go first!
Ready to create an unforgettable moment?
A well-prepared photo booth costs no more than a poorly prepared one. The difference is the care you put into the details: the right format, the custom frame, a well-placed guest book, the magnetic frame as a keepsake.
Discover our packages for every wedding on our Packages page, or book your Badabooth directly on the Book page.
FAQ
How many photos are printed per photo booth session?
Each session prints 2 copies of the photo: one for the guest to keep as a keepsake, and one for the guest book. This is how Badabooth packages work by default with the strip formats.
Which photo format should you choose for a wedding?
The 3-photo strip format (5×15 cm) is the most popular for weddings. It allows 3 different poses, slips perfectly into a guest book, and leaves a customisation area for your names and the date.
What is a magnetic frame and where can you find one?
A magnetic frame is a photo frame with a magnet on the back, sized to your photo format. Your guests slip their photo in and stick it on their fridge when they get home. You can easily find them on sites like Etsy, Amazon or from local printers. Allow €1.50 to €3 each.
Can we customise the photo frame with our wedding theme?
Absolutely. The Badabooth frame editor lets you choose your colours and fonts, and add your names, the date, a logo or monogram, and even a hashtag. All in a few minutes, with no design skills needed.
How long does it take for guests to take their photo?
Allow about 30 to 45 seconds per session (time to pose + printing). Over a 4-hour evening, a photo booth can easily produce 200 to 400 prints, more than enough for 80 to 150 guests.
Do you need an attendant for the photo booth?
No. The Badabooth is designed to work completely on its own: touchscreen with instructions, automatic trigger, instant printing. No need for anyone to watch over it. To find out more, read our article Photo booth without an attendant: how does it work?.
Does the photo booth work outdoors?
Yes, as long as it is protected from direct sunlight and damp. Plan an awning, a tent or a marquee and make sure you have a power socket nearby (or a suitable extension lead).
When is the best time to launch the photo booth during the wedding?
The ideal time is after dessert, when guests are relaxed and in a party mood. Let it run throughout the dancing for as many photos as possible. An announcement by the DJ or the master of ceremonies boosts participation.
How do you combine the photo booth with the guest book?
Choose the strip format (double print). Set up the guest book, glue and pens on a table right next to the photo booth. Guests stick one strip in the book, write a note, and keep the second one as a keepsake.
How much does a wedding photo booth cost?
Badabooth packages start from €144, delivery included anywhere in Luxembourg; the best-selling Happy package (150 photos, fast printing) is €275. Find all the details on our Packages page. The photo booth is delivered to your door, ready to use, with no hidden fees.