How to set up a photo booth at home in 5 minutes: the complete guide
You have booked a photo booth for your event and you are wondering whether setting it up will be complicated? Good news: with Badabooth, it takes 5 minutes, with no technical skills at all. No host, no technician, no tools: you are 100% self-sufficient.
This detailed guide covers everything you need to know: what is in the box, the step-by-step setup, the technical specs, choosing the right spot for your venue, fixing common problems, and a complete checklist for the big day.
Contents
- What you receive in the box
- Technical specifications by model
- The 4 setup steps
- Where should you put your photo booth?
- Setup tips by venue type
- Big day checklist
- Comparison: Badabooth vs other photo booths
- Troubleshooting: common problems and their solutions
- The return: as easy as the setup
- FAQ
What you receive in the box
When your Badabooth arrives (delivered 1 to 2 working days before your event, anywhere in Luxembourg), the box contains everything you need:
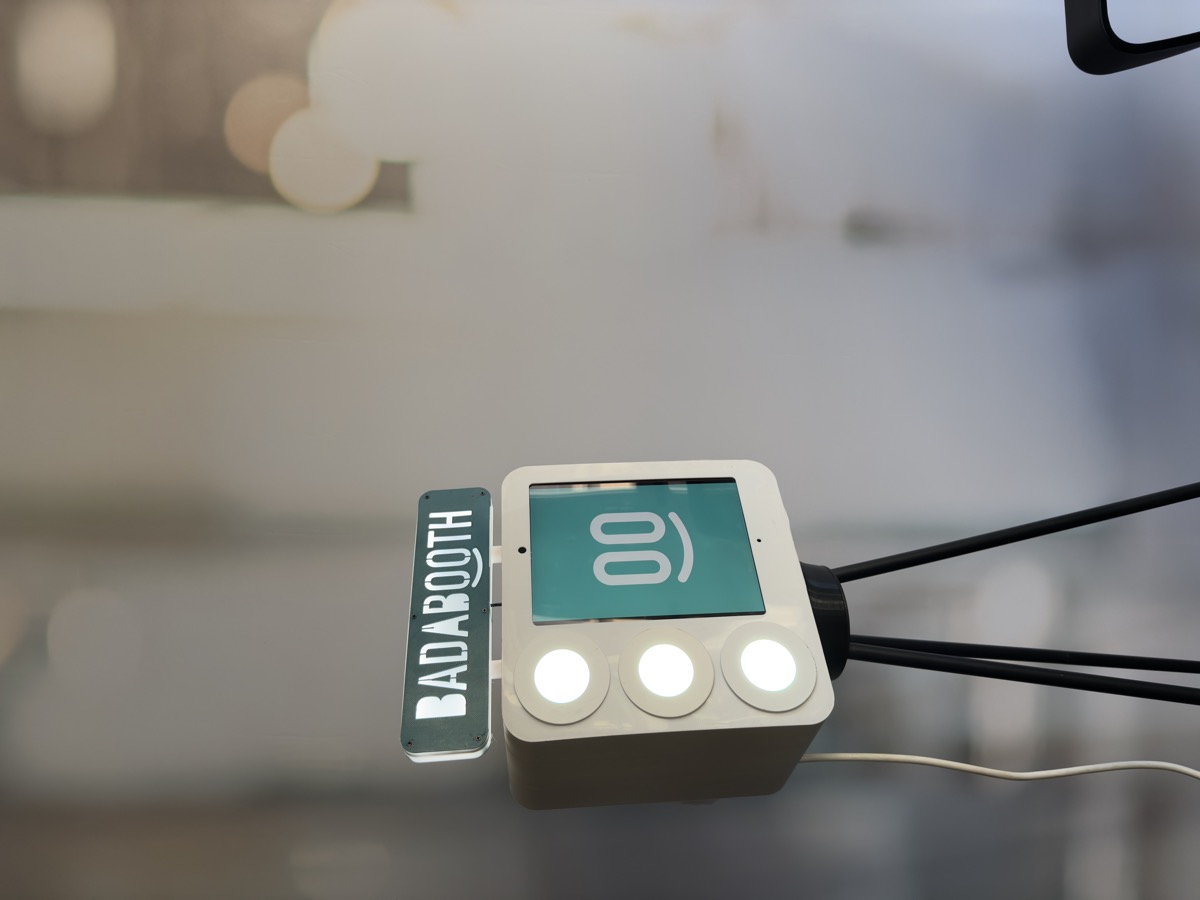
- The Badabooth photo booth: the main unit with the touchscreen and built-in camera
- The legs: 3 parts to screw together per leg, no tools needed
- The light-up sign: the topper that gives it that party look
- The printer with photo paper already loaded (depending on the package: 50, 150 or 400 prints)
- The cables: booth power + printer power + booth-to-printer connection cable
- The prepaid return label: for sending it back after the event
- A laminated quick guide with illustrated setup steps
Everything is ready to use. No software to configure, nothing to download, no password to enter, no WiFi connection to set up. The personalised photo frame you chose when ordering is already configured in the booth.
Tip: open the box as soon as it arrives to check everything is there. That gives you time to contact Badabooth support if you have a question, rather than discovering an issue 30 minutes before your guests arrive.
Technical specifications by model
The Badabooth comes in three sizes, matching the three packages. Here are the detailed specifications so you can plan the space you need:
| Specification | Smart | Happy | Smile |
|---|---|---|---|
| Box dimensions | 60 x 35 x 35 cm | 75 x 35 x 35 cm | 90 x 45 x 35 cm |
| Total weight | 10 kg | 15 kg | 20 kg |
| Printed photos | 50 | 150 | 400 |
| Guest capacity | Up to 30 | Up to 70 | Up to 200 |
| Price (delivered anywhere in Luxembourg) | €144 | €275 | €399 |
| Power supply | Standard 220V | Standard 220V | Standard 220V |
| Sockets needed | 1 socket | 1 socket | 1 socket |
All models run on a standard 220V electrical socket (a regular household socket). A single connection powers both the booth and the printer thanks to the built-in connection system. The Badabooth is made in France, designed to be light and compact so it is easy to handle.
Good to know: even the Smile model, the largest, weighs only 20 kg and can easily be carried by one person. That is about the weight of a travel suitcase.
The 4 setup steps
Step 1: Assemble the legs (2 minutes)
Each leg is made of 3 parts that screw together. The screw system is intuitive: each part only fits the right way round, so you cannot get it wrong.
- Take the leg parts out of the box
- Screw the 3 sections together (by hand, no tools)
- Attach each assembled leg to the base of the Badabooth unit
- Check stability by pressing lightly on the booth
Tip: assemble the legs on the floor, then lift the booth. It is easier than trying to screw the legs on once the booth is in position.
The legs are fitted with non-slip pads that work on all types of floor: parquet, tiles, carpet, grass (for covered outdoor events).
Step 2: Place the light-up sign (30 seconds)
Place the light-up sign on top of the booth. It clips on easily and switches on automatically when the booth is powered. The sign instantly gives your photo booth a party look and catches your guests’ eye.
Step 3: Connect the printer (1 minute)
- Put the printer on a table next to the booth (a side table, a small round table or even a sturdy chair will do)
- Plug the connection cable between the Badabooth and the printer
- Plug the printer’s power cable into the socket
One cable on each side, impossible to get wrong. The connectors are different, so they only fit the right port. The photo paper is already loaded at the factory: nothing to insert or configure.
Step 4: Switch on and you are ready (30 seconds)
Press the booth’s power button. The screen lights up, the personalised photo frame appears, and the photo booth is ready to take photos. Do a quick test:
- Stand in front of the screen
- Press the button to start the capture
- Check that the photo displays correctly
- Check that printing starts (if your package includes printing)
That is it. Five minutes, not one more. Your photo booth is up and running.
Testimonial: “I was worried it would be complicated. In reality, it took me 4 minutes flat, and I even had time to take 3 test selfies before the guests arrived.” Thomas R., wedding, June 2025
Where should you put your photo booth?
Choosing the spot is crucial to get the most out of your photo booth. A well-placed photo booth will be used by 92% of your guests. Badly placed, that figure can drop to 30%.
Good spots
- Near the dance floor: guests naturally walk past and the party atmosphere encourages them to pose
- Next to the bar or buffet: the mood is relaxed, people are in good spirits and often waiting with a drink in hand
- In a thoroughfare: visible to everyone and easy to reach, without blocking traffic
- In a dedicated corner: to create a real “photo corner” with a decorated backdrop and props
Spots to avoid
- In full sun: direct light affects the screen and produces overexposed photos
- Too far from the action: if it is in an isolated corner or a separate room, nobody will go there spontaneously
- Near the sound system speakers: the noise makes it hard to coordinate groups and follow the countdown
- In a narrow corridor: groups need room to pose (allow 2 to 3 metres in front of the booth)
- On unstable ground: avoid sloping surfaces or very soft ground (sand, fine gravel)
The space you need
Allow a minimum space of:
- Width: 1.5 metres (the booth + the printer on its table)
- Depth in front: 2 to 3 metres (so groups can pose comfortably)
- Height: 2 metres (the booth with the sign is about 1.80 m tall)
Setup tips by venue type
Every venue has its own quirks. Here are our tailored recommendations.

At home (living room, lounge)
This is the most common case for birthdays and family parties. The living room usually offers everything you need:
- Electrical socket: there is always one nearby
- Ideal spot: against a wall, next to the sofa or the buffet table
- Photo backdrop: a plain wall (white, beige) makes an excellent backdrop. You can also hang a curtain or garlands
- Lighting: switch off the overhead light and opt for side lamps for softer lighting
Tip: push the sofa back to free up space in front of the photo booth. People tend to stand too far from the screen.
In a village hall or reception venue
Space is not a problem, but watch out for distances:
- Distance to sockets: village halls often have sockets on the outer walls. Bring a 5 to 10 metre extension lead if you want to place the photo booth in the middle
- Photo backdrop: village hall walls are rarely attractive. Use a curtain, a sheet or a balloon arch as a backdrop
- Strategic position: place the photo booth in the same area as the DJ/sound system and the dance floor
Outdoors (garden, covered terrace)
The Badabooth can work outdoors under certain conditions:
- Mandatory: shelter (marquee, gazebo, awning). The photo booth must not be exposed to rain, even light rain
- Lighting: in the evening, the built-in flash is enough. During the day, avoid direct sun on the screen
- Ground: place the photo booth on a flat, stable surface (terrace, paving). On grass, check stability
- Temperature: the Badabooth works between 10 and 35°C. Below 10°C, the printer may struggle
- Electricity: use an extension lead suitable for outdoor use (sufficient cable size, protected)
At a restaurant or hotel
If your event takes place in a venue:
- Ask for permission from the manager before the event
- Scouting: visit the venue in advance to identify the ideal spot and the electrical sockets
- Delivery: the Badabooth is delivered to your home. Plan to bring it to the venue on the day (the box fits in any car boot)
At the office (open space, meeting room)
For corporate parties and team building:
- Location: in the reception area or cafeteria, never in an isolated office
- Brand backdrop: take advantage of the free personalised frame to include the company logo and colours
- Sockets: plentiful in offices, but check that the socket is not on a circuit shared with sensitive equipment
Big day checklist
Print this checklist and tick off each step on the day of your event:
2 hours before the event
- Open the box and check all the contents
- Choose the final spot
- Check there is an accessible electrical socket (or bring an extension lead)
- Clear the space: at least 2-3 metres in front of the booth
1 hour before the event
- Assemble the legs and attach the booth
- Place the light-up sign
- Set up the printer on a stable table next to the booth
- Plug in the cables (connection + power)
- Switch on the booth
30 minutes before the event
- Do a test: take a photo and check the print
- Adjust the position if needed (centring, distance from the wall)
- Lay out the props on a table nearby (hats, glasses, signs…)
- Set up the decorated backdrop if planned
10 minutes before the event
- One last quick test
- Check that the printed photos come out properly
- Make sure the space in front of the photo booth is clear
- Enjoy the party!
Comparison: Badabooth vs other photo booths
Setup is often the weak point of photo booth solutions. Here is how Badabooth compares:
| Criterion | Badabooth | Traditional photo booth (with host) | DIY photo booth (phone + app) |
|---|---|---|---|
| Setup time | 5 minutes | 30-60 minutes | 15-30 minutes |
| Skills required | None | Technician needed | Technical skills |
| Tools needed | None | Professional tools | Tripod, lighting, app |
| Software configuration | Pre-configured | On site by the technician | Set it up yourself |
| WiFi needed | No | Often yes | Yes |
| Host needed | No | Yes (included) | No |
| Printing | Automatic | Automatic | No printing |
| Footprint | Compact (60-90 cm) | Bulky (150+ cm) | Variable |
| Weight | 10-20 kg | 50-100 kg | 2-5 kg |
| Photo quality | Professional | Professional | Variable |
| Animated GIFs | Included | Depends on provider | Depends on app |
| Price | €144-399 | €600-1200 | €0-50 (excluding equipment) |
The Badabooth combines the best of both worlds: the quality and features of a professional photo booth, with the simplicity and price of a self-service solution. Google rating: 4.7/5 and 5/5 on Trustpilot.
For a more detailed comparison of the solutions on the market, see our guide to photo booths without a host.
Troubleshooting: common problems and their solutions
Even though setup is simple, here are the situations you might come across and how to fix them in seconds.
The screen does not switch on
Possible causes:
- The power cable is not plugged in properly
- The wall socket is not working
Solutions:
- Check that the cable is pushed all the way in at both ends (wall socket and booth)
- Test the socket with another device (a phone charger, for example)
- If the socket does not work, try another socket or use an extension lead
- If the problem persists, contact Badabooth support
The printer does not connect to the booth
Possible causes:
- The connection cable between the booth and the printer is not plugged in properly
- The printer is not switched on
Solutions:
- Unplug and replug the connection cable at both ends
- Check that the printer is powered (indicator light visible)
- Switch off the booth, wait 10 seconds, then switch it back on
The photos are too dark or too bright
Possible causes:
- The photo booth is facing a strong light source (window, spotlight)
- The surroundings are very dark
Solutions:
- Move the photo booth to avoid backlighting
- If the surroundings are very dark, add some indirect extra lighting
- The built-in flash is calibrated for most situations, but a minimum of ambient light improves the result
The photo paper has run out
Solutions:
- The booth displays a message when the paper is nearly finished
- The number of prints matches your package (50, 150 or 400)
- Digital photos remain unlimited even when the paper runs out
- Guests can still take photos and get them digitally
The booth is unstable
Solutions:
- Check that the 3 sections of each leg are screwed together firmly
- Make sure the floor is flat and stable
- On uneven ground, place a thin board under the legs to level them
- On thick carpet, press the legs slightly into the carpet to stabilise them
The touchscreen does not respond
Solutions:
- Clean the screen with a dry cloth (fingerprints can interfere with detection)
- Restart the booth (switch off, wait 10 seconds, switch back on)
- If the problem persists after restarting, contact Badabooth support
Reassuring: across more than 10,000 events, these problems are extremely rare. The vast majority of users set up and use the Badabooth without any difficulty. The quick guide supplied in the box also covers these scenarios.
The return: as easy as the setup
After your event, taking it down takes 3 minutes:
- Switch off the booth by pressing the button
- Unplug the cables (power + printer connection)
- Remove the light-up sign
- Unscrew the legs
- Put all the parts back in the original box (each piece has its place)
- Stick the prepaid return label on the box
- Drop off the box at a UPS access point
The return label is already paid for, so you have nothing to pay. Simply drop the box off at the UPS access point nearest you. The return is as easy as the setup.
Tip: keep the original cardboard box in good condition during the event. Store it in a cupboard or behind a piece of furniture. You will need it for the return.
FAQ
How many electrical sockets do I need?
A single socket is enough to run everything (booth + printer). If your socket is far from where you want the booth, an ordinary extension lead does the job perfectly. Avoid power strips overloaded with other power-hungry devices (heaters, powerful sound systems).
How much space do I need to set up the photo booth?
Allow a space 1.5 m wide (booth + table for the printer) and 2 to 3 m deep in front of the booth so groups can get into position comfortably. In height, allow at least 2 metres (the booth with the sign is about 1.80 m tall).
Does the Badabooth work outdoors?
Yes, under shelter (marquee, gazebo, awning). It must not be exposed to rain or humidity. Outdoors, avoid direct sun on the screen and make sure the temperature is above 10°C. The ground must be flat and stable.
Do I need a WiFi connection?
No. The Badabooth works completely standalone, without any internet connection. This is a major advantage: many reception venues (châteaux, barns, rural village halls) do not have reliable WiFi. Sharing photos via AirDrop also works without WiFi.
How much does the Badabooth weigh?
Depending on the model: 10 kg (Smart), 15 kg (Happy) or 20 kg (Smile). That is about the weight of a travel suitcase. One person can carry and set up the photo booth without difficulty. To find out more about the models, see our packages.
Can I move it during the event?
Yes, but it is not recommended once the event has started. If you need to move the Badabooth, switch it off first, unplug the cables, move it, then plug it back in. It takes 2-3 minutes. It is better to plan the ideal spot from the start.
What happens if I cannot drop off the return box straight away?
Don’t panic. You generally have a few days after the event to drop the box off at a UPS access point. The exact deadline is given in your confirmation email. The return label is prepaid, so you just drop off the box when it suits you.
Is there a risk of breaking the photo booth?
The Badabooth is designed to be handled by people with no experience. The structure is sturdy and the connections are intuitive (each cable only fits the right port). There are no fragile exposed parts. Handle it with a little care, like any electronic device, and everything will be fine.
Convinced by how simple it is? Book your Badabooth and enjoy a hassle-free setup. Made in France, rated 4.7/5 on Google and 5/5 on Trustpilot. If you are still wondering whether a photo booth without a host is right for you, read our article Photo booth without a host: how does it work?. And to discover our prices and packages, head to the Our packages page.